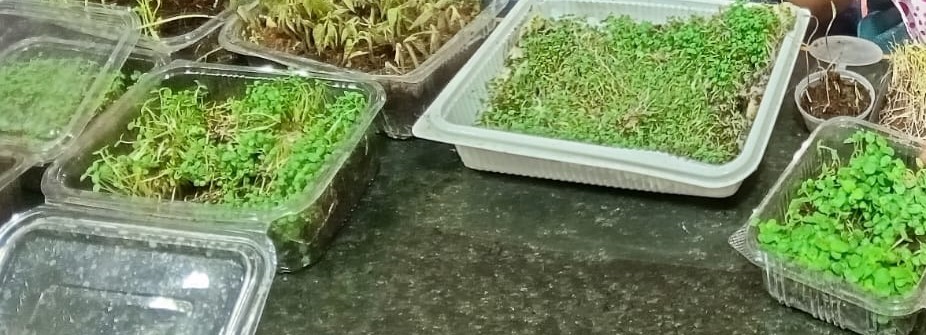
மைக்ரோகிரீன் பயிரிடுவதற்கான படிகள்
Step 1: Choose a Microgreen Variety மைக்ரோகிரீன் வகையைத் தேர்வு செய்யவும்
Decide which microgreens to grow. Popular options include: Vegetable greens: Radish, broccoli, spinach. Herbs: Chia, basil, Sabja. Legumes and grains: Pea shoots, wheatgrass, Grams, sunflower. Consider your taste preferences and growth requirements. Around 120 types of microgreen seeds are available. Soaking and allowing soaked seeds for sprouting is important step in microgreen cultivation. No need to soak seeds like Chia, Sabja, onion and Lemon.
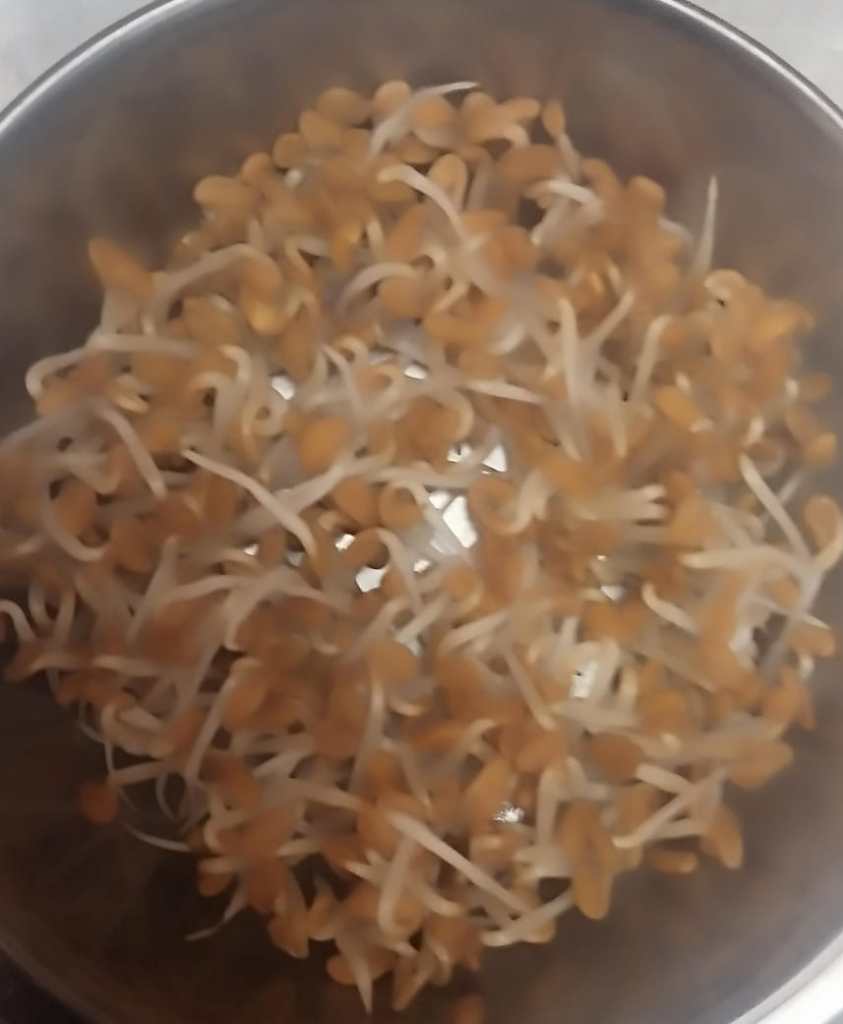
Procedure for sprouting: Drain the soaked seeds and place them in a white cotton cloth. Tie the edges of the cloth to form a ball. Place the tied seeds in a clay pot and cover the pot with a lid.
Soaking and sprouting time depends on the size of the seeds: Small size seeds (Mustard, Fenugreek, Radish, Cumin) – 5 – 8 hours soaking and 12 hours for Sprouting. Medium size seeds (Blackgram, Palak, Cowpea, etc.,) – 5 – 8 hours soaking and 18-24 hours for Sprouting. Big size seeds (Peas, Chickpea, Groundnut, etc.,) – 12 hours soaking and 18-24 hours for Sprouting.
எந்த மைக்ரோகிரீன்கள் வளர்க்க வேண்டும் என்பதை முடிவு செய்யுங்கள். பிரபலமான விருப்பங்கள் பின்வருமாறு: காய்கறி கீரைகள்: முள்ளங்கி, ப்ரோக்கோலி, கீரை. மூலிகைகள்: சியா, துளசி, சப்ஜா. பருப்பு வகைகள் மற்றும் தானியங்கள்: பட்டாணி, கோதுமை புல், சூரியகாந்தி.
உங்கள் சுவை விருப்பத்தேர்வுகள் மற்றும் வளர்ச்சித் தேவைகளைக் கவனியுங்கள். சுமார் 120 வகையான மைக்ரோகிரீன் விதைகள் கிடைக்கின்றன. ஊறவைத்த விதைகளை முளைப்பதற்கு அனுமதிப்பது மைக்ரோகிரீன் சாகுபடியில் முக்கியமான படியாகும். சியா, சப்ஜா, வெங்காயம் மற்றும் எலுமிச்சை போன்ற விதைகளை ஊறவைக்க தேவையில்லை.நேரிடையாக பயிர் செய்யலாம்.

முளை கட்டுதல் செயல்முறை: ஊறவைத்த விதைகளை வடிகட்டி வெள்ளை பருத்தி துணியில் பந்து போல் கட்டவும். கட்டப்பட்ட விதைகளை ஒரு மண் பானையில் வைக்கவும், பானையை ஒரு மூடியால் மூடவும்.

ஊறவைக்கும் மற்றும் முளைக்கும் நேரம் விதைகளின் அளவைப் பொறுத்தது: சிறிய அளவிலான விதைகள் (கடுகு, வெந்தயம், முள்ளங்கி, சீரகம்) - 5 - 8 மணி நேரம் ஊறவைத்தல் மற்றும் முளைப்பதற்கு 12 மணிநேரம். நடுத்தர அளவு விதைகள் (உளுந்து, பலாக், கோதுமை போன்றவை) - 5 - 8 மணி நேரம் ஊறவைத்து, முளைப்பதற்கு 18-24 மணி நேரம். பெரிய அளவிலான விதைகள் (பட்டாணி, கொண்டைக்கடலை, நிலக்கடலை போன்றவை) - 12 மணி நேரம் ஊறவைத்து, முளைப்பதற்கு 18-24 மணி நேரம்
Step 2: Gather Materials பொருட்களை சேகரிக்கவும்
Seeds: Select untreated, Non GMO or organic seeds for microgreen cultivation. Seeds are selling in shop usually treated with chemical preservatives. It is harmful. So use only untreated seeds.
விதைகள்: மைக்ரோகிரீன் சாகுபடிக்கு சிகிச்சையளிக்கப்படாத, GMO அல்லாத கரிம விதைகளைத் தேர்ந்தெடுக்கவும். விதைகள் பொதுவாக இரசாயன பதப்படுத்தப்பட்ட கடைகளில் விற்கப்படுகின்றன. இது தீங்கு விளைவிக்கும். எனவே பதப்படுத்தப்படாத விதைகளையே பயன்படுத்தவும்.
Growing Medium: Options include: Soil (well-drained, organic potting soil) or Soilless mediums (coco coir, Coir mat, peat moss, or vermiculite) or Hydroponic mats or fiber pads. Surface of mud pot will be used for Chia and Sabja seeds growing. Soil is best medium for Soyabean microgreen instead of cocopeat.
வளர்ப்பு ஊடகம்: வடிகால் வசதி உள்ள மண் / தென்னை நார் கழிவு / பீட் மாஸ் / ஹைட்ரோபோனிக் பாய்கள். சியா மற்றும் சப்ஜா விதைகளை வளர்ப்பதற்கு மண் பானையின் மேற்பரப்பு பயன்படுத்தப்படும். கோகோபீட்டுக்கு பதிலாக சோயாபீன் மைக்ரோகிரீனுக்கு மண் சிறந்த ஊடகம்.
Trays/Containers: Use shallow trays (1–2 inches deep), ideally with drainage holes.
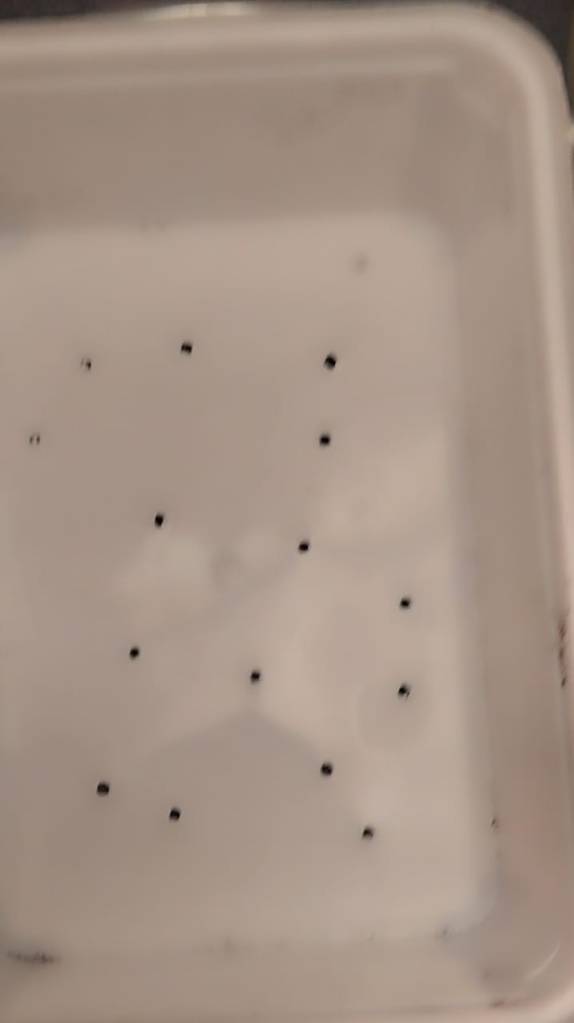
தட்டுகள் / கொள்கலன்கள்: வடிகால் துளைகளுடன் கூடிய ஆழமற்ற தட்டுகளை (1-2 அங்குல ஆழம்) பயன்படுத்தவும்.
Watering Tools: Shallow trays (1–2 inches deep) filled with water
நீர்ப்பாசன கருவிகள்: ஆழமற்ற தட்டுகள் (1-2 அங்குல ஆழம்) தண்ணீர் நிரப்பப்பட்டிருக்கும்
Light Source: Natural sunlight in semi shaded area or grow lights (LEDs are ideal).
Optional: A cover or second tray to maintain humidity during germination.
ஒளி: இயற்கையான சூரிய ஒளி அரை நிழலாடிய பகுதியில் அல்லது வளரும் விளக்குகள் (எல்.ஈ.டி சிறந்தவை).

தேவைப்பட்டால்: முளைக்கும் போது ஈரப்பதத்தை பராமரிக்க ஒரு கவர் அல்லது இரண்டாவது தட்டு.
Step 3: Prepare the Growing Tray வளரும் தட்டு தயார்
Fill the tray with 1–2 inches of pre-moistened soil or place the hydroponic mat in the tray. Level the surface to ensure even seed distribution. Ensure the growing medium is damp but not waterlogged. Cocopeat should be properly washed and sun dried before seeding.
தட்டில் 1-2 அங்குல முன் ஈரமாக்கப்பட்ட மண்ணை நிரப்பவும் அல்லது ஹைட்ரோபோனிக் பாயை தட்டில் வைக்கவும். சீரான விதை விநியோகத்தை உறுதி செய்ய மேற்பரப்பை சமன் செய்யவும். வளரும் ஊடகம் ஈரமாக இருந்தாலும் நீர் தேங்காமல் இருப்பதை உறுதி செய்யவும். விதைப்பதற்கு முன் கோகோபீட்டை சரியாகக் கழுவி வெயிலில் உலர்த்த வேண்டும்.
Step 4: Sow the Seeds விதைகளை விதைக்கவும்
Spread the sprouted seeds evenly across the surface of the growing medium. Avoid overlapping too much to prevent overcrowding. Gently press the seeds onto the soil or mat for better contact but do not bury them. Mist the growing tray with water tray to keep them moist.
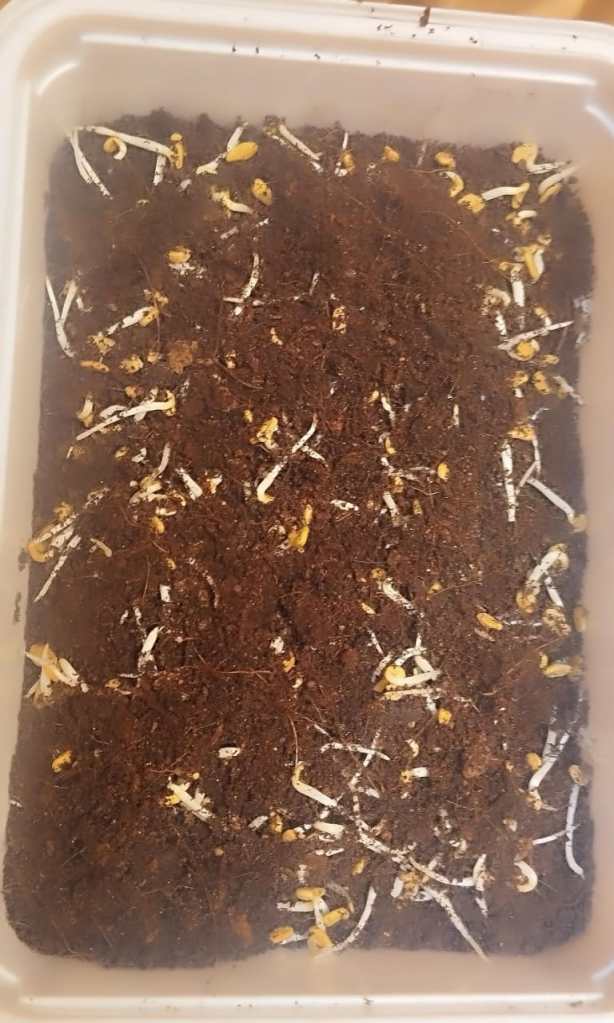
முளைத்த விதைகளை வளரும் ஊடகத்தின் மேற்பரப்பில் சமமாக பரப்பவும். நெரிசலைத் தடுக்க அதிகமாக ஒன்றுடன் ஒன்று சேர்வதைத் தவிர்க்கவும். சிறந்த தொடர்புக்காக விதைகளை மண் அல்லது பாயின் மீது மெதுவாக அழுத்தவும் ஆனால் அவற்றை புதைக்க வேண்டாம். வளரும் தட்டில் ஈரமாக இருக்க, தண்ணீர் தட்டு கொண்டு மிஸ்ட் செய்யவும்.
Step 5: Cover for Germination முளைப்பதற்கான கவர்s
Cover the tray with a lid or another tray to block light and maintain humidity. Place the tray in a warm, dark location (18–24°C or 65–75°F) for 2–3 days (varies by seed type). Check daily to ensure the medium remains moist.
ஒளியைத் தடுக்கவும் ஈரப்பதத்தை பராமரிக்கவும் ஒரு மூடி அல்லது மற்றொரு தட்டில் தட்டை மூடி வைக்கவும். தட்டை ஒரு சூடான, இருண்ட இடத்தில் (18-24°C அல்லது 65-75°F) 2-3 நாட்களுக்கு வைக்கவும் (விதை வகையைப் பொறுத்து மாறுபடும்). ஈரமாக இருப்பதை உறுதி செய்ய தினமும் சரிபார்க்கவும்.
Step 6: Expose to Light வெளிச்சம்
Once the seeds sprout and develop tiny shoots (typically 2–5 days), remove the cover. Place the tray in bright, indirect sunlight or under grow lights for 10–16 hours daily. Rotate the tray if using natural sunlight to ensure even growth.
விதைகள் முளைத்து, சிறிய தளிர்கள் (பொதுவாக 2-5 நாட்கள்) வளர்ந்தவுடன், மூடியை அகற்றவும். தினசரி 10-16 மணி நேரம் பிரகாசமான, மறைமுக சூரிய ஒளியில் அல்லது வளரும் விளக்குகளின் கீழ் தட்டு வைக்கவும். சீரான வளர்ச்சியை உறுதி செய்ய இயற்கையான சூரிய ஒளியைப் பயன்படுத்துங்கள்.
Step 7: Water Carefully கவனமாக தண்ணீர் விடவும்
Use shallow trays that are 1–2 inches deep. Fill these trays with water and place the seeded tray on top of the watering tray. Keep it there for 15–30 minutes. Watering every 2–3 days is sufficient. Regularly check the moisture content of the seeded pot, as maintaining proper moisture is essential. Avoid overwatering, which can lead to mold or root rot. Ensure good air circulation to prevent fungal issues.
1-2 அங்குல ஆழத்தில் ஆழமற்ற தட்டுகளைப் பயன்படுத்தவும். இந்த தட்டுகளில் தண்ணீர் நிரப்பி, விதைத்தட்டை தண்ணீர் தட்டுக்கு மேல் வைக்கவும். 15-30 நிமிடங்கள் அங்கேயே வைக்கவும். ஒவ்வொரு 2-3 நாட்களுக்கு ஒருமுறை நீர்ப்பாசனம் போதுமானது. சரியான ஈரப்பதத்தை பராமரிப்பது அவசியம். அதிகப்படியான நீர்ப்பாசனத்தைத் தவிர்க்கவும், இது வேர் அழுகலுக்கு வழிவகுக்கும். பூஞ்சை பிரச்சனைகளை தடுக்க நல்ல காற்று சுழற்சியை உறுதி செய்யவும்.
Step 8: Monitor Growth வளர்ச்சியை கண்காணிக்கவும்
Microgreens grow quickly and are typically ready for harvest in 7–21 days, depending on the variety. Look for the first set of true leaves (second leaves after cotyledons) as a sign of readiness.
மைக்ரோகிரீன்கள் விரைவாக வளரும் மற்றும் பொதுவாக வகையைப் பொறுத்து 7-21 நாட்களில் அறுவடைக்கு தயாராக இருக்கும்.
Step 9: Harvest அறுவடை
Use clean scissors or a sharp knife to cut the microgreens just above the soil or growing mat. Harvest in the morning for the best flavor and texture. Rinse the microgreens in cold water to remove debris or soil, if needed. Pat dry gently with a paper towel. One time harvest: Sabja, Cumin, Beetroot, Wheat, etc., Ratooning (4-5 times harvest in a cultivation): Chickpea (5-6 nodes stage harvesting period – Creeper type), Moringa, peas, Ground nut etc., Harvesting period for Papaya – 12-15 days, Lemon – 6-7 days, Cabbage – 7 – 10 days, Sunflower – 8 – 10 days, Carrot – 12-14 days.
சுத்தமான கத்தரிக்கோல் அல்லது கூர்மையான கத்தியைப் பயன்படுத்தி மைக்ரோகிரீன்களை மண்ணின் மேல் அல்லது வளரும் பாயின் மேலே வெட்டவும். சிறந்த சுவை மற்றும் அமைப்புக்காக காலையில் அறுவடை செய்யுங்கள். தேவைப்பட்டால், குப்பைகள் அல்லது மண்ணை அகற்ற மைக்ரோகிரீன்களை குளிர்ந்த நீரில் அலசவும். மெதுவாக உலர வைக்கவும். ஒரு முறை அறுவடை: சப்ஜா, சீரகம், பீட்ரூட், கோதுமை போன்றவை, ரட்டூனிங் (ஒரு சாகுபடியில் 4-5 முறை அறுவடை): கொண்டைக்கடலை (5-6 முறை அறுவடை காலம் - கொடி வகை), முருங்கை, பட்டாணி, நிலக்கடலை போன்றவை. பப்பாளி அறுவடை காலம் - 12-15 நாட்கள், எலுமிச்சை - 6-7 நாட்கள், முட்டைக்கோஸ் - 7 - 10 நாட்கள், சூரியகாந்தி - 8 - 10 நாட்கள், கேரட் - 12-14 நாட்கள்.
Step 10: Store or Use சேமிக்கவும் அல்லது பயன்படுத்தவும்
Use microgreens fresh for the best taste and nutrition. If storing, place them in an airtight container lined with a slightly damp paper towel in the refrigerator. They typically last 5–7 days.
சிறந்த சுவை மற்றும் ஊட்டச்சத்துக்காக மைக்ரோகிரீன்களை புதியதாகப் பயன்படுத்தவும். சேமித்து வைத்தால், குளிர்சாதன பெட்டியில் சற்று ஈரமான காகித துண்டுடன் மூடப்பட்ட காற்று புகாத கொள்கலனில் வைக்கவும். அவை பொதுவாக 5-7 நாட்கள் நீடிக்கும்.
Tips for Success:
- Maintain cleanliness to avoid contamination.
- Experiment with different varieties to discover flavors and growth patterns.
- Avoid overwatering and ensure proper ventilation to prevent mold growth.
- Excellent Entrepreneurial opportunity for youngsters and homemakers with minimum investment starts with Rs.5000 – Rs.10000. Ensuring marketing is vital process in entrepreneurial journey success.
குறைந்த முதலீட்டில் இளைஞர்கள் மற்றும் இல்லத்தரசிகளுக்கான சிறந்த தொழில் முனைவோர் வாய்ப்பு ரூ.5000 - ரூ.10000 இல் தொடங்குகிறது. தொழில் முனைவோர் பயண வெற்றியில் சந்தைப்படுத்துதலை உறுதி செய்வது ஒரு முக்கிய செயலாகும்.
Happy Greening
